Baking Journal
How to Keep Cake from Sticking to the Pan
Prevent a cake from tearing during release with the right pan prep, a sensible cooling rest, and a gentle turning-out method for layer and Bundt pans.
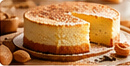
The cake looks done, but it will not release from the pan. A few crumbs around the edge are normal; a layer torn from the bottom is frustrating and hard to hide. The most dependable fix happens before the batter goes in: choose the right pan prep for the shape of the cake, then let the cake cool just long enough to set before turning it out.
For round, square, and rectangular layer cakes
Line the bottom with parchment and coat the sides with nonstick pan spray or a thin layer of grease. For an extra-secure release, grease the pan, lay in the parchment, and grease the parchment too. Cut a parchment round by tracing the pan base, then trim just inside the line so the paper lies flat. For square pans, cut parchment to cover the base; if the recipe uses a sling to lift the cake, leave two longer edges above the sides.
King Arthur Baking’s pan-prep tests found parchment paired with nonstick spray to be the most reliable choice for standard cake pans. A dusting of flour can help with some cakes, but it is not a complete substitute for parchment when the cake is delicate or has sticky chocolate, caramel, or fruit pieces. For chocolate cake, cocoa powder can replace flour for dusting so you do not leave pale marks.
Bundt pans need a different approach
A Bundt pan has ridges and a center tube, so parchment is difficult to fit. Coat every groove thoroughly with a baking spray formulated with flour, or use a thin layer of softened shortening followed by a light dusting of flour. Rotate the pan as you brush or spray, and check the central tube and the narrow channels. Tap out loose flour before adding batter.
Butter alone can leave gaps in the coating, and too much flour can leave a dusty crust. If the pan has a complex design, give it a few extra seconds of inspection before you pour. Follow the pan maker’s care instructions, especially if it has a nonstick coating.
Match the method to the cake
- Layer cake: parchment on the base, spray or grease on the sides.
- Chocolate layer cake: use cocoa for a dusting if the recipe calls for greasing and flouring.
- Sticky add-ins: use parchment and spray to create a continuous barrier.
- Bundt cake: grease every detail and dust lightly, or use a flour-based baking spray.
- Angel food cake: do not grease the pan unless the recipe specifically says to; the batter needs to cling as it rises.
Use the pan size in the recipe whenever possible. A smaller pan holds a deeper layer of batter, which can change baking time and make the cake harder to turn out cleanly. If the cake is also browning unevenly or the center seems underdone, check doneness before removing it; our guide to how to tell when a cake is done explains several clues to use together.
When and how to turn it out
Place the pan on a rack after baking and follow the cooling time in the recipe. Many butter cakes need a short rest—often around 10 minutes—so the crumb can firm up while the pan is still warm. Waiting too long can let sugary edges set against the metal; turning it out immediately can make a tender cake break. Recipe instructions take precedence because cakes vary.
- Run a thin flexible spatula around the sides only if the cake is not already separated from the pan. Avoid cutting into the cake.
- Set a wire rack over the pan and hold both together with oven mitts.
- Invert in one steady motion, then set the rack down.
- Lift the pan straight up. If the cake resists, tap the base gently and give it a small shake; do not yank it sideways.
- Peel parchment from the warm cake if the recipe says to remove it at this stage.
If one spot sticks, lay a warm damp towel over the outside of the pan for a minute, then try a gentle lift again. Do not pour water into the pan or soak it while the cake is inside. For a cake that has already broken, let it cool fully before repairing with frosting; warm crumbs are more likely to pull away.
Next time, note the pan and prep
Pan coatings age, and dark or scratched pans may behave differently from newer light-colored ones. Write down the pan size, lining, and cooling time that worked. A little preparation prevents the most common release problems, and a cleanly released layer is easier to stack and frost. If your cake recipe uses creamed butter, check that the butter is properly softened too; this quick butter guide covers the finger test and a controlled shortcut.