Baking Journal
How to tell when bread dough is proofed
Judge the final rise of bread dough with visual cues and a gentle poke test, including what changes with cold, wet, or whole-grain dough.
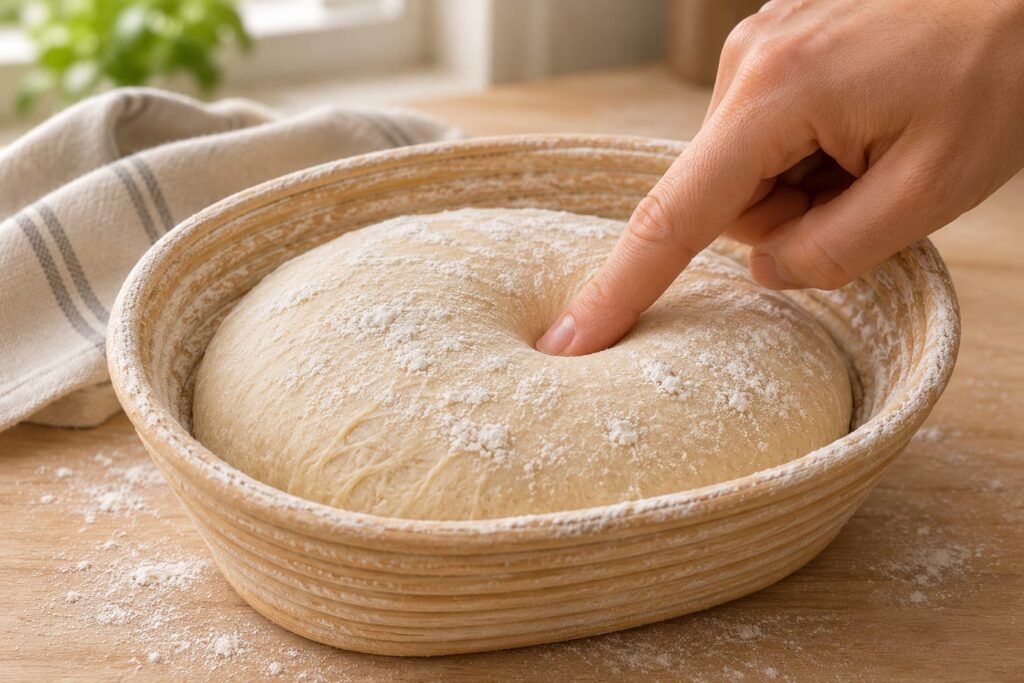
A shaped loaf is usually ready to bake when it looks fuller and aerated and a gentle finger press recovers slowly, leaving a small dent. Read that response alongside the recipe’s rise instructions. Cold dough, very wet dough, and dough made with a high proportion of whole grains can give misleading results.
This guide concerns the final rise after shaping, especially wheat-based loaves proofed at room temperature. It is a technique guide, with no claim of kitchen testing by BakeChronicle. For a loaf that is still fermenting in its mixing container, use our guide to judging sourdough bulk fermentation.
Check which rise you are judging
Bulk fermentation happens before the dough is divided and shaped. Final proofing follows shaping and ends when the loaf goes into the oven. A recipe may call both stages a rise or a proof; British recipes also use the word proving. Check the sequence of instructions before deciding which signs to use.
During the final rise, the shaped dough expands again. A sandwich loaf has the sides of its pan for support; a freestanding loaf spreads outward as well as upward. Comparing their height alone can lead you to wait too long. The Perfect Loaf’s proofing guide explains how this stage differs from bulk fermentation.
Look at the loaf before touching it
Read the recipe’s description of the finished rise, then compare it with the dough in front of you. Look for a fuller outline and a lighter, puffier appearance than the loaf had immediately after shaping. An early photograph is a useful reference if you find gradual changes hard to notice.
For pan bread, use the pan size specified by the recipe. Some sandwich bread recipes ask for the dough to stand about 1 inch (2.5 cm) above the rim, but that is not a target for every loaf. A wider pan can make the same amount of dough look low. A lidded pan or a different bread style may require a different endpoint.
A ruler helps when a recipe gives a height target. Hold it beside the pan without pressing on the dough. Follow that recipe’s stated rise rather than transferring a measurement from an unrelated loaf. These visual checks follow King Arthur Baking’s guidance on assessing risen dough.
Use a gentle poke as a second check
- Begin checking near the start of the recipe’s suggested final-rise window. Have the oven preheating according to the recipe so a ready loaf does not have to wait.
- Uncover the dough and lightly flour a clean fingertip to reduce sticking.
- Press gently into one small area of the surface, then withdraw your finger. Make a clear indentation without crushing the loaf or repeatedly prodding it.
- Watch how the indentation changes. Compare the response with the loaf’s expansion and the recipe’s instructions before deciding to bake.
For a typical room-temperature wheat loaf, quick recovery suggests it needs more time; slow, partial recovery supports readiness. Dough that stays deeply dented and feels fragile may have gone too far. These are working clues, not a guarantee. Maurizio Leo’s explanation of the poke test also describes its limitations.
Decide what to do next
| What you notice | Possible reading | Next step |
|---|---|---|
| The loaf is still compact and the dent fills quickly. | It may be underproofed. | Cover it again, allow more time, and check for further expansion. |
| The loaf is puffy and the dent recovers slowly, remaining partly visible. | It may be ready. | Confirm the recipe’s endpoint and prepare to bake. |
| The dough is very fragile, slumps, or collapses when touched. | It may be overproofed. | Handle gently and consider the recovery options below. |
Keep the method consistent across bakes. For example, write down whether the dough was at room temperature or refrigerated when you checked it. Comparing a cold loaf with a warm one makes the same finger response harder to interpret.
When the test can mislead you
Refrigerated dough is firmer, so it can spring back quickly despite having completed its rise. Very wet dough and dough with substantial whole-grain or low-gluten flour can show little recovery for reasons other than overproofing. Use the recipe’s schedule and the dough’s overall condition as additional evidence. Do not extend a cold proof solely because one dent disappears quickly.
The same limitations mean a photograph cannot certify readiness. A still image shows shape and surface, but not how fast a dent recovered or how the dough felt. The cover illustration here depicts the checking technique; it does not establish an ideal proofing endpoint.
Keep the proofing conditions steady
Temperature changes the pace of fermentation. For many breads, a room around 72 to 78°F (about 22 to 26°C) is a useful starting range, though the recipe may specify different conditions. Cover the dough so the surface does not dry out, leaving room for expansion. A dry skin makes surface assessment less helpful.
King Arthur Baking’s proofing overview discusses temperature and covers. If your room is much cooler, see our cold-kitchen proofing guide. Check the temperature of the place you choose; avoid putting dough in an oven that is being heated for baking.
If the dough has risen too far
A modest delay and a collapsed loaf need different decisions. Some doughs made with active dry or ordinary instant yeast can be gently deflated, reshaped, and allowed to rise again. This is not a universal rescue: rapid-rise yeast designed for a single quick rise and long-fermented sourdough need particular care. King Arthur Baking’s recovery demonstration explains that distinction.
A very weak sourdough may not tolerate another shaping. The Perfect Loaf suggests alternatives such as baking in a loaf pan or adapting it to focaccia; follow a suitable method rather than assuming your original baking time still applies. If you bake the loaf as it is, expect a different shape and possibly reduced oven spring.
Keep one useful note for the next loaf
Record the recipe, flour, final-rise conditions, the dough’s appearance when you baked it, and how the cooled crumb turned out. An entry such as “same pan, cooler room, longer rise, dent recovered slowly” is more useful than recording the elapsed minutes alone. Keep the recipe constant while learning its endpoint, then use our guide to scoring bread dough when the loaf is ready for the oven.